Creating Tic-Tac-Toe Game on a 3.5" TFT LCD Display with Arduino (Part 6 of 6)
By Aditya
/
August 5, 2024
This blog shows how to use a 3.5" TFT LCD touchscreen with an Arduino to create the popular Tic-Tac-Toe game, including a start menu to select the piece and a grid to play moves on. It is the last of six parts showing how to use a 3.5" TFT LCD Shield (driven by an ILI9486 driver) with an Arduino UNO R3/R4/Mega for beginners. The blog contains two sections. The first section explains the architecture of the Tic-Tac-Toe app, while the second section shows the circuit and code. This project ends the series by combining the learning from the previous parts to build a fun app.
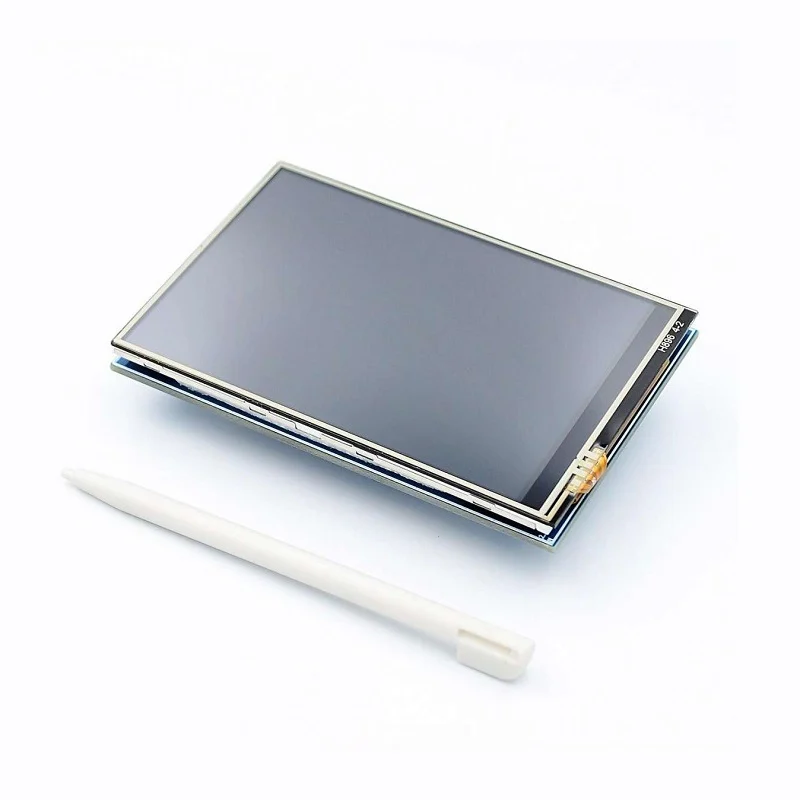
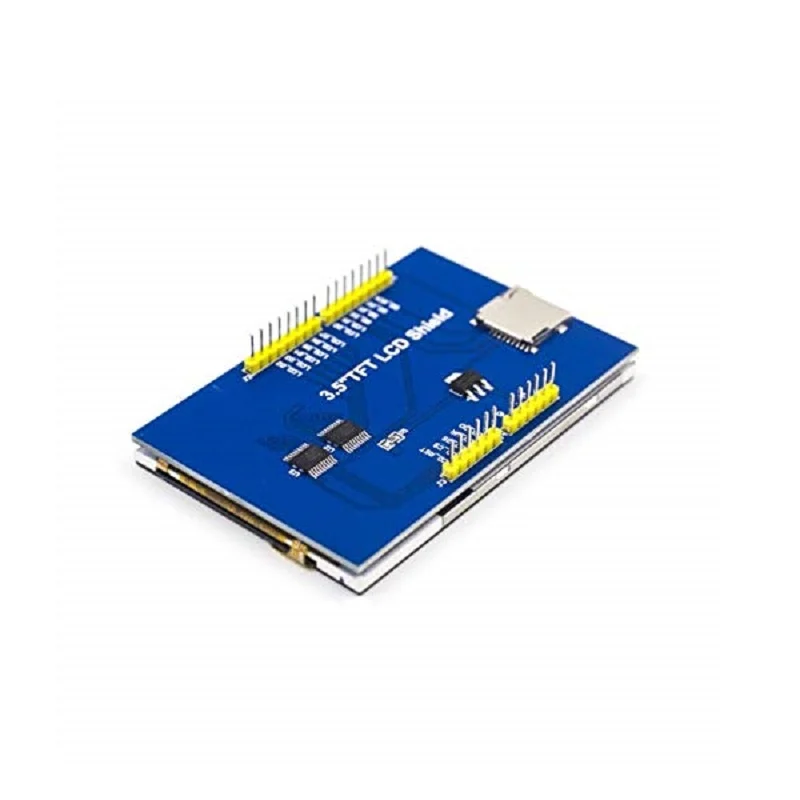
The ILI9486 TFT LCD shield has a thin film transistor (TFT) liquid crystal display (LCD) with a generous resolution of 480x320 pixels & 16-bit color depth (65,536 unique colors), a builtin touchscreen, and abuiltin SD Card slot. It is sold under different names, a popular one being ILI9486 MCUFRIEND TFT LCD Shield, and its form factor and low-cost make it a very attractive option to add rich display capabilities to your Arduino projects.
This is a comprehensive series of six blogs about interfacing a 3.5" TFT LCD Shield with an Arduino Board (including the newer UNO R4 Minima/WiFi). For an introduction to the display and the libraries, refer to the first part of this series. To see how to calibrate and use the touch screen, refer to the second part of this series. To see how to use text files with the library, refer to the third part of this series. To see how to use an SD card with the display module to offload image storage, see the fourth part. To see how store To see how to build a Paint app (including a color picker, size picker and canvas), visit the fifth part of this series.
All the examples given in this blog (and series) have been tested on the Arduino UNO R3, Arduino Mega, Arduino UNO R4 Minima and Arduino UNO R4 Maxima. This blog uses the Adafruit GFX, Adafruit Touchscreen and MCUFRIEND libraries for performing various tasks with the displays, and the SPI library and SD Card Library to communicate with the SD Card.
Let's get started!
Briefly recapping the previous parts
The first part of this series went over the hardware components of the ILI9486 TFT LCD Shield, and showed the libraries required to operate it (along with their installation). It also covered the software architecture used to drive the display and ran some builtin examples as well as our own programs to verify its working.
The second part picked up from here and comprehensively talked about and demonstrated the calibration of the ILI9486 TFT LCD's touchscreen (along with a program and video).
The third part moved the focus to the SD Card slot on the TFT LCD Shield and showed how to load/store text files, using both builtin examples and our own examples focusing on practical use cases.
The fourth part explained the bitmap format and showed a program to store and display image files from the SD Card to the TFT LCD Shield.
The fifth part used the learning from its predecessors to build a Paint app, complete with a canvas to draw on, a color-selector and a stroke-size selector.
This blog concludes the series by implementing Tic-Tac-Toe using the TFT LCD Shield.
Architecture of Tic-Tac-Toe app with ILI9486 TFT LCD Shield
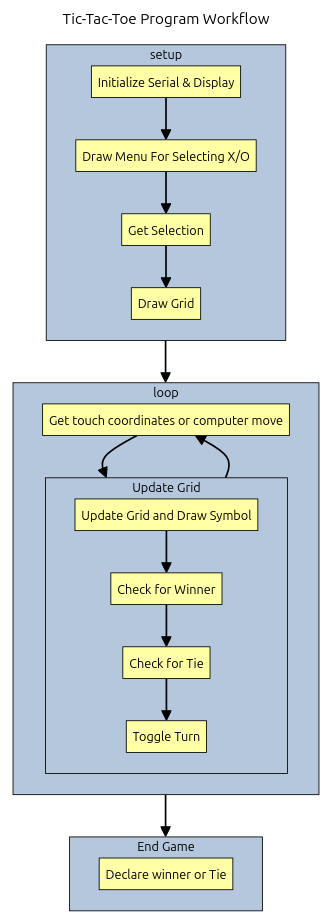
The program contains three high-level phases - The menu-phase, play-phase and endgame-phase.
The menu-phase comes first and involves prompting the user to select between X and O. The opponent (Arduino) is automatically assigned the piece opposite to what the user selects.
The play-phase comes next and involves the two players placing their pieces on the grid, with X going first. After every move, the game checks if the winning condition is met for either player. If so, the winner is declared and the game ends. Otherwise, the game checks if the grid is filled. If so, a draw is declared and the game ends. If neither condition is met, then the piece whose turn it is gets toggled and the play-phase continues,
The endgame-phase comes after the play-phase ends and simply involves displaying the winning piece (either X or O) and winning player (either the user or Arduino), or a displaying a tie between the two on the display.
Code for Tic-Tac-Toe with ILI9486 TFT LCD Shield
This section shows how to implement the flowchart shown earlier in code. A video demonstrating it is shown below -
The app starts off with a menu prompting the user to choose between "X" and "O". After a selection is made, the opponent is automatically assigned the piece that the user did not select.
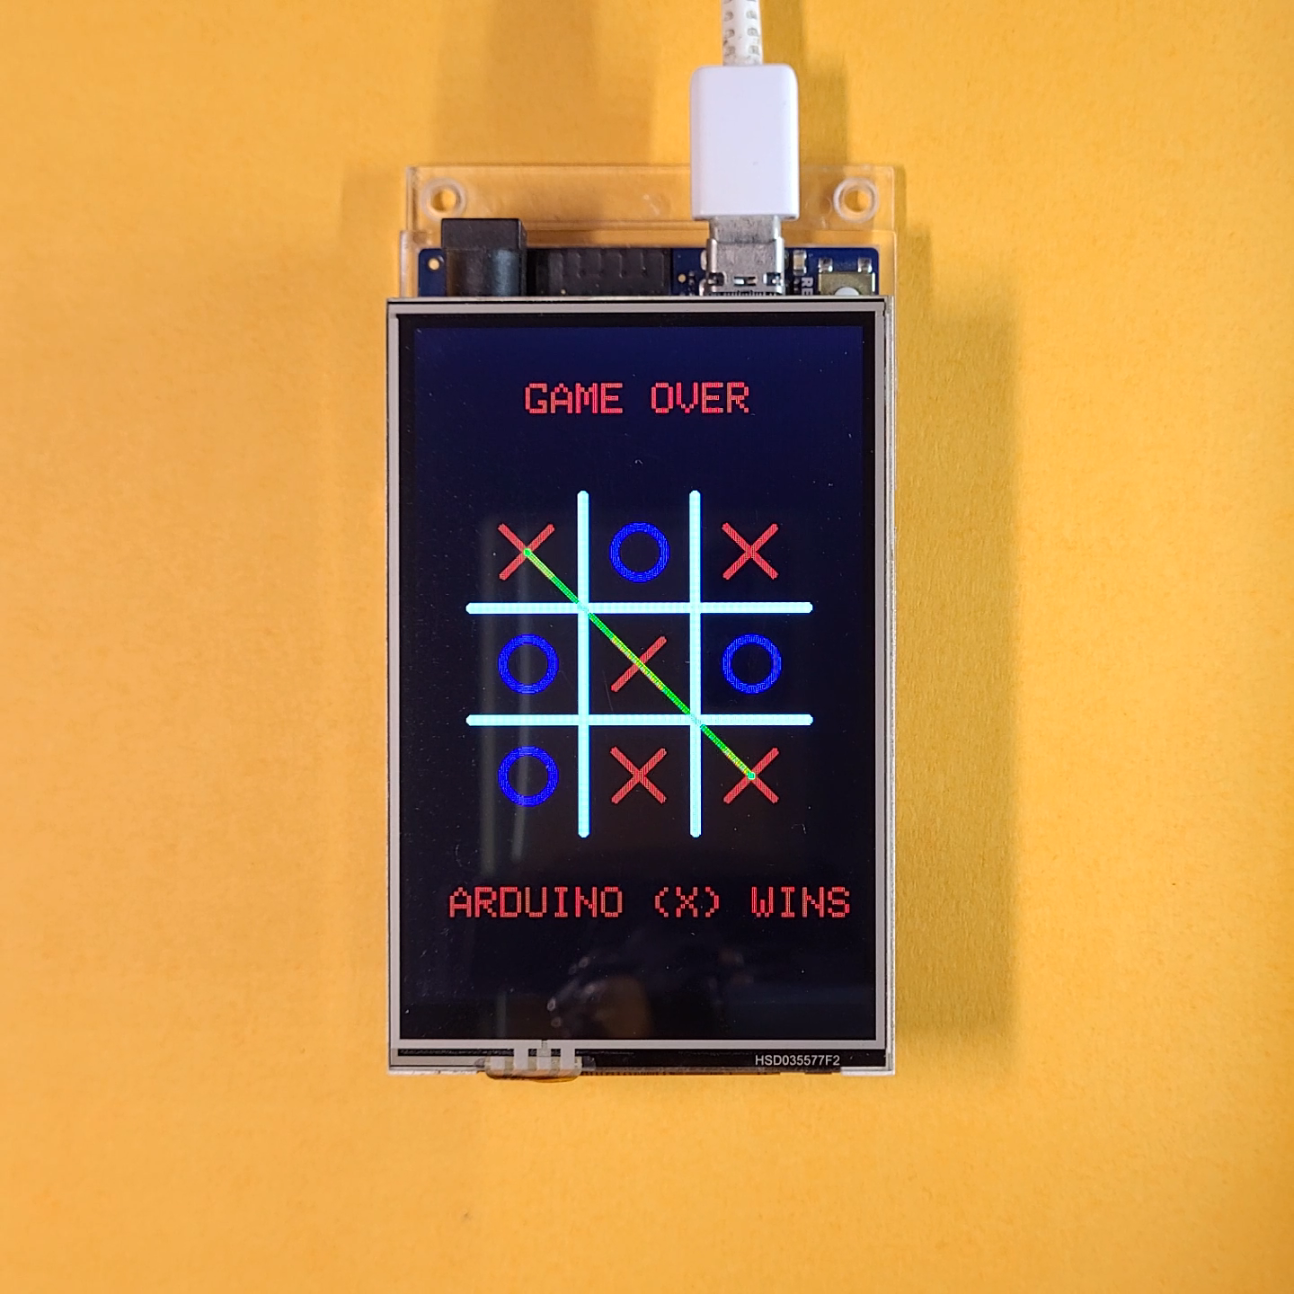
After the player makes a selection, the game starts and 3x3 grid is displayed.
The objective of the player is to fill a row, column or diagonal with 3 consecutive occurrences of their chosen piece. X moves first.
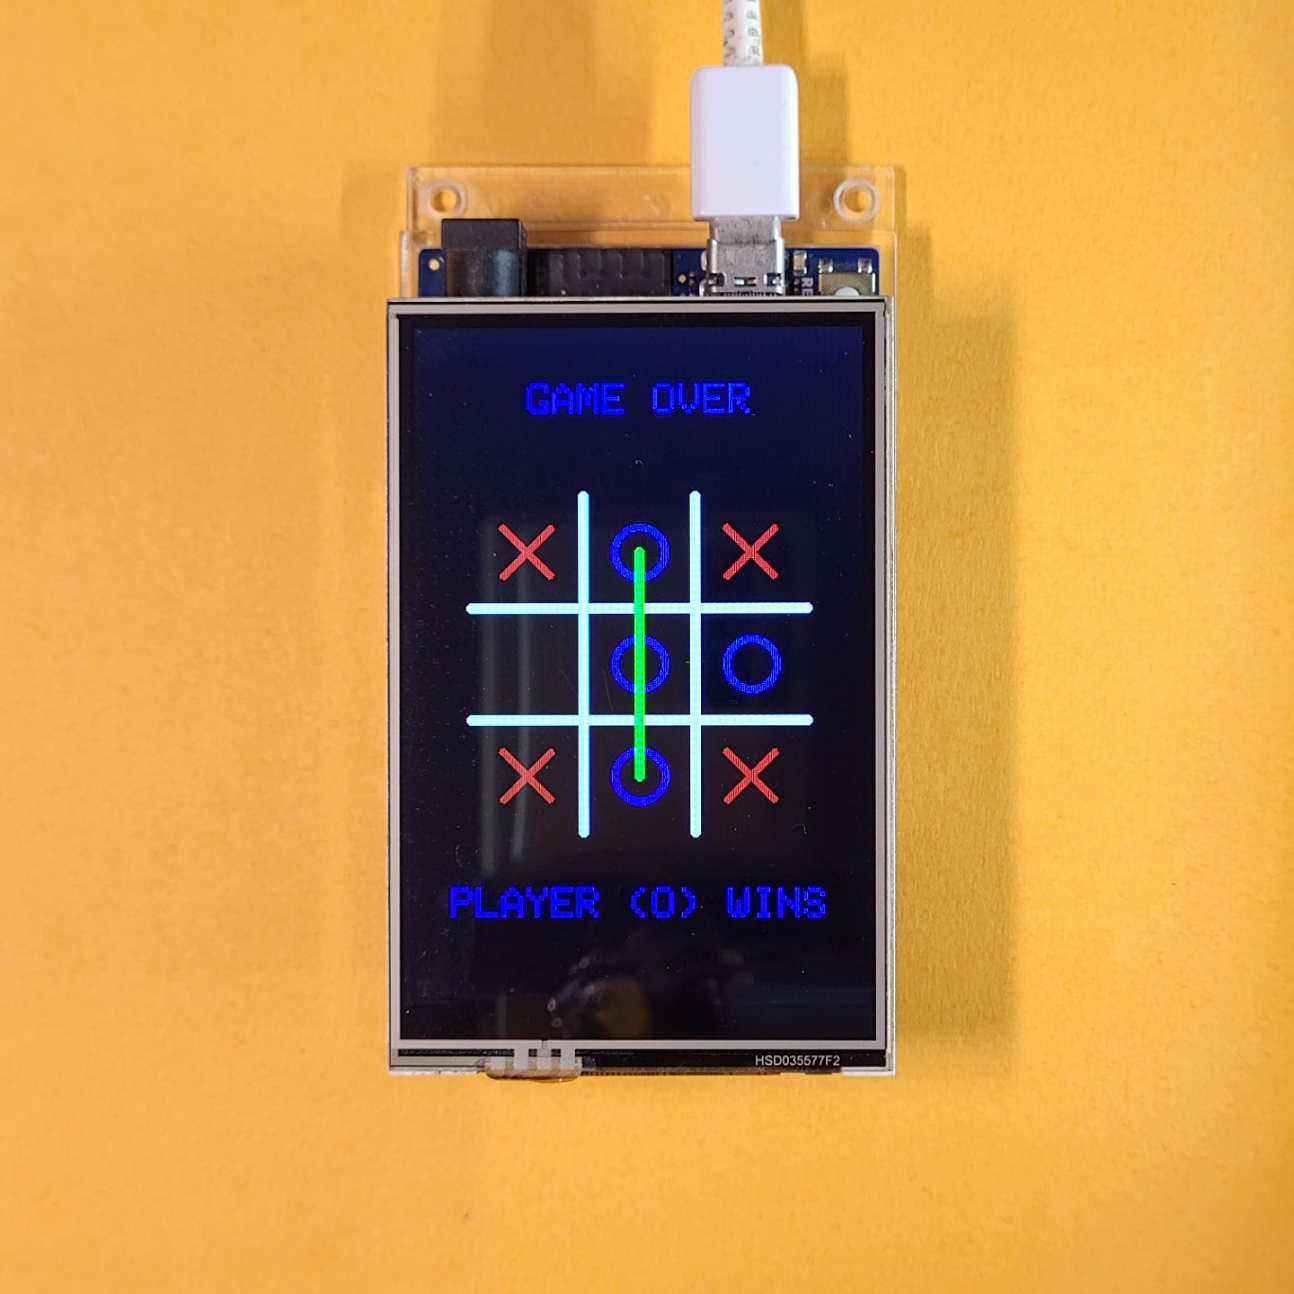
Once a player has successfully completed the objective, a line is drawn to indicate the winning row/column/diagonal and a message is displayed indicating that the game is over, and the piece that won. If the grid is filled completely before either player meets the objective, then the game ends in a draw.

The circuit for the project is quite simple as well, involving only the ILI9486 LCD Shield and an Arduino. Create a new project and create the constants.h file. Add the following code in it -
The procedure to create the file, as well as its explanation was given in the first and second parts of this series. In brief, it contains constants that are used throughout the program, and are kept separate from the main file for the sake of readability. The constants are divided into three categories - those used to operate the display, the touchscreen, and application-specific values. To create the file, click on the downward arrow on the top-right corner of the Arduino IDE.
Moving onto the main file, add the following code in it -
The above code implements the flowchart shown earlier. Let us look at it more closely.
The complete code can be found here on Github.
Library inclusion
These lines include the libraries necessary to drive the display, touchscreen as well as the constants.h file. The process to install and use these libraries was shown in the first and second parts of this series.
Global variables
These lines include the creation of the tft and ts objects, which are used to drive the display and touchscreen respectively on the ILI9486 LCD Shield. These lines also include the declaration of the following variables -
| Variable | Purpose |
|---|---|
player | The piece chosen by the player, can be either |
turn | The piece whose turn it is, toggles between |
moves | The number of moves played. Useful for debugging. |
grid | The state of the grid. Each location starts empty ( |
The constants NONE, CROSS and NAUGHT are declared in the constants.hfile and are simply aliases for integer values.
Setup function
The setup function initializes the Serial and tft objects and fills the display black to clear it. It then calls the drawMenu andupdateMenu functions to draw the menu and wait for the user to select a piece. Once the selection is made, the updateMenu function returns and the screen is cleared again. Finally, the grid is draw using the drawGrid function. There is a short delay added between clearing the screen and drawing the grid to reduce abruptness.
Loop function
The loop function starts by checking whose turn it is (the user or the Arduino). The variable turn stores the piece that should move in the current iteration while the variable player stores the piece that the player controls. player is assigned a value at the start of the game when the user makes a selection, while turn is toggled after every iteration of the loop, with an initial value of CROSS. If the two match, then it is the player's turn, otherwise it is the Arduino's.
When it is the Arduino's turn, an empty cell is randomly selected and the piece is placed on it. When it is the player's turn, the function waits for a touch input to be made on an empty cell of the grid, which will be used to place the piece.
After the piece is placed (and the display updated), the winning condition is checked using the getWinner function, which also returns the winning player. If this condition is met, then thedrawWinner function is used to declare the winning piece and player on the display, and the program is halted using an infinite loop.
If the winning condition is not met, then the getTie function is used to check if the grid is completely filled. If this is true then the drawTie function is called to declare the tie on the display, and an infinite loop is used to halt the program.
If neither condition is met, then the value of turn is toggled using the expression turn = NAUGHT + CROSS - turn. This line works because it subtracts the current value of turn (either CROSS or NAUGHT) from the value NAUGHT + CROSS. This achieves the net effect of switching the value of turn. Recall that NAUGHT and CROSS are integer constants declared in the constants.h file.
Helper math functions
The in_range function accepts three arguments and checks if the first value (called value) lies between the next two (called lo and hi).
Touch input management functions
The above lines include helper functions to drive the touchscreen. The valid_touch function returns true if a touch is occurring. The get_touch function reads the touch coordinates and stores them in the variables given to it. The convert function converts the coordinates from touchscreen coordinates to pixel values. Finally, the to_display_mode function resets the pins shared by the display and touchscreen back to outputs after the touchscreen is used.
The detailed explanations for these functions was given in the second part of this series. The functions require the touchscreen to be calibrated, which was also explained in the second part of this series.
Helper graphics functions
These lines include functions to draw shapes such as thick horizontal and vertical lines, thick slanted lines and the O and X shapes.
The thick horizontal and vertical lines (drawn with thedrawThickHLine and drawThickVLine functions) are used while drawing the grid lines as well as highlighting a complete row or column. They are drawn as filled rectangles with filled circles at each end to round off the edge.
The thick diagonal lines (drawn with are used to highlight a complete diagonal). They are drawn as multiple regular lines with filled circles at each end to round off the edge.
The O is drawn using two concentric circles. A large filled circle is first drawn and a smaller black circle is drawn inside it to create a thick ring.
The X is drawn using using a rounded rectangle and 4 triangles. A large filled rounded rectangle is drawn and 4 filled triangles are drawn inside it, with their base aligned with the edges and the top pointing towards the center. The triangles are colored black and result in a thick X being drawn.

Widget drawing functions
These lines include functions to draw the various widgets used in the program. The drawMenu and drawMenuItem functions are used to draw the piece selection menu and the options respectively. Each option is drawn as a rectangle with text inside it.
The drawGrid function draws the grid using 4 lines (2 vertical lines to make 3 columns, and 2 horizontal lines to make 3 rows).
The drawWinner and drawTie functions are used to draw the winner and draw screens respectively.
Widget update functions
These lines include the updateMenu function, which is responsible for handling the selection of the piece by the user. It contains a single loop, which starts with getting the location of the touch. If the location of the touch lies within one of the options, the variable player is assigned the value of the option and the program breaks out of the loop. If not, the loop continues until the break condition is met.
Endgame functions
These lines include the getWinner and getTie functions, which are used to check if a player has won or the game has ended in a draw. The getTie function is the simpler of the two and simply returns true if the number of moves is equal to 9, and false otherwise. This condition is sufficient to determine if the game has ended in a draw, because it is guaranteed that an empty cell becomes occupied after each move, and that after 9 moves all empty cells are occupied. If neither player wins before this, then the game has indeed ended in a draw.
The getWinner function is a little longer, and checks each row, column and diagonal for the winning condition. First, a loop runs over the columns (vertical groups). In each iteration, if the first cell is not empty, and the values of the three cells are the same, then the function returns the value of the top cell of the current row (which can be either CROSS or NAUGHT). This process repeats for the rows (horizontal groups) as well. Finally, the two diagonals are checked in a similar fashion, and if no condition is met then the function returns NONE, to indicate that neither player has won the game yet.
Final Thoughts
This blog concludes the topics introduced in the previous parts of the series by building a popular and timeless game on the TFT LCD touchscreen. After finishing this blog and the series, you should be capable of creating more complex applications using the display and using it to add graphics to your projects.
If you have any questions or suggestions, feel free to leave them in the comments below!