Get started with Mbed OS on Arduino (Part 1)
By Aditya
/
April 2, 2020
In this two-part tutorial, we will get started with Mbed OS (a powerful and lightweight RTOS from ARM) on recent Arduino boards such as those from the MKR and Nano families. The newer boards use 32-bit ARM Cortex processors, and are geared more towards connected applications such as IOT. Therefore having Mbed OS integration has many advantages such as first class support for security and more.
This blog is the first of a two-part series, and focuses on building a simple understanding of an RTOS (Real Time Operating System), and its need in embedded applications. It then shows how to set up the Mbed Core on the Arduino IDE and compile an empty program to test it. The next part starts off with an example program and moves on to multi-threading code examples with Mbed OS running on the Arduino, click here to go to the second part.
The need for multitasking and an RTOS
For those coming from a background in Arduino, it is important to understand what an RTOS is, and why it is needed, before getting started.
An RTOS (Real Time Operating System) is a piece of software that runs on a microcontroller/microprocessor, and is responsible for scheduling threads and managing their usage of memory. It may optionally provide a layer of abstraction over the hardware resources for the application to use as well. But why is it needed? Most people reading this blog have successfully made Arduino Projects without using an RTOS.
A large number of systems, such as TV remotes, doorbells etc., have linear input, processing and output. They do not require an RTOS to function. Even seemingly complicated systems, such as large LED Cubes, can work with a program which is executed as a sequence of steps/instructions. In such cases, a simple microcontroller, such as the Arduino UNO can be used to read pins and respond. Additionally, interrupts can be used to service the occasional out of sequence activity.
Modern embedded systems, however, are more complex and have more demanding needs than the ones mentioned above. Some examples of these are internet connectivity, concurrent sensor data collection and processing, running OTA (over-the-air) firmware updates etc. Sometimes, it may also be the case that an external peripheral runs slower than the microcontroller. Trying to access this peripheral would stall the entire program, including other tasks. Tasks that were not dependent on the peripheral could have been performed while the microcontroller was waiting for it to be usable.
Certain systems, such as automatic breaking systems used in automobiles, or the sensors used in aircrafts also have an additional requirement of maintaining time-bounded responses to events, lack of which would pose a risk to human life and property. Finally, all of these requirements must be satisfied without sacrificing low power consumption and reliability.
The above mentioned requirements all have the following common features -
- Independent tasks must be performed concurrently
- As many tasks as possible should meet their deadlines
- Deciding which tasks should meet their deadlines must also take into consideration their priorities
An RTOS, such as Mbed OS, enables applications to meet the above mentioned requirements. Using an RTOS could also potentially reduce development cost, since its software components can be re-used without having to start over from scratch for every application.
Contrasting an conventional Arduino program with an MBed program
Consider the following diagrams that contrast the flow of two programs, a regular Arduino Program (without an RTOS) and another with an RTOS. Note that the diagrams are a simplified representation.
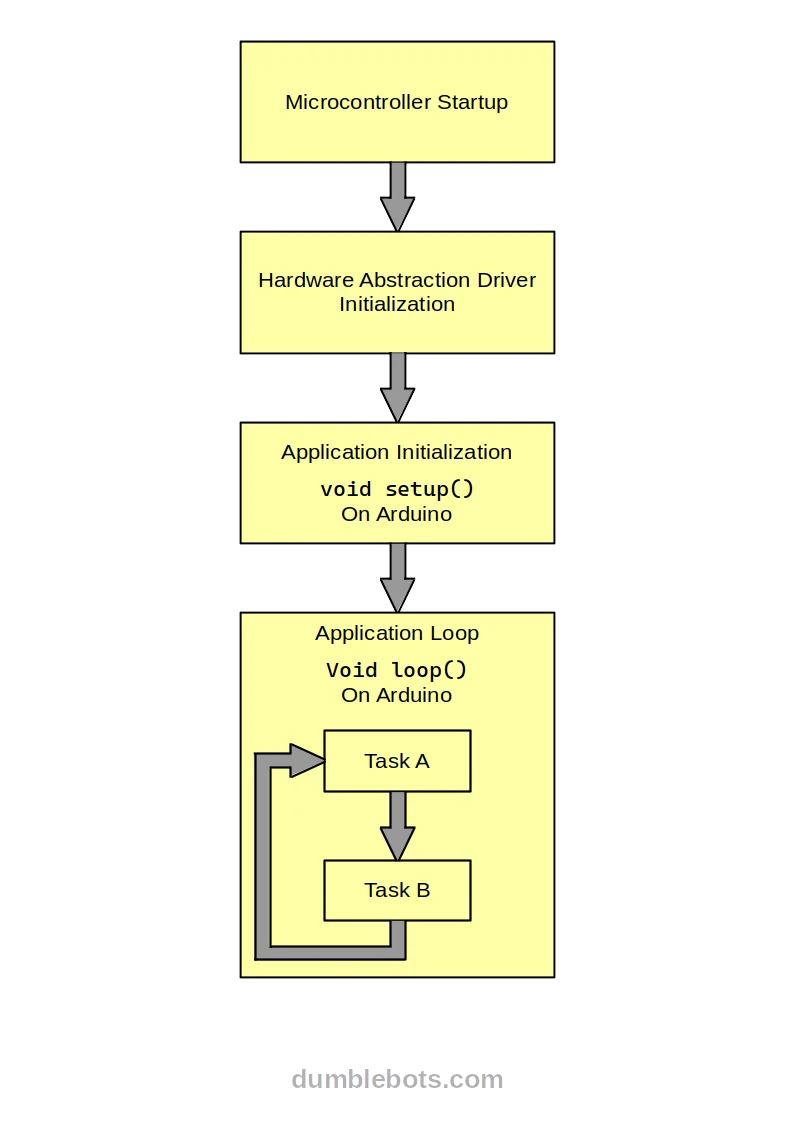
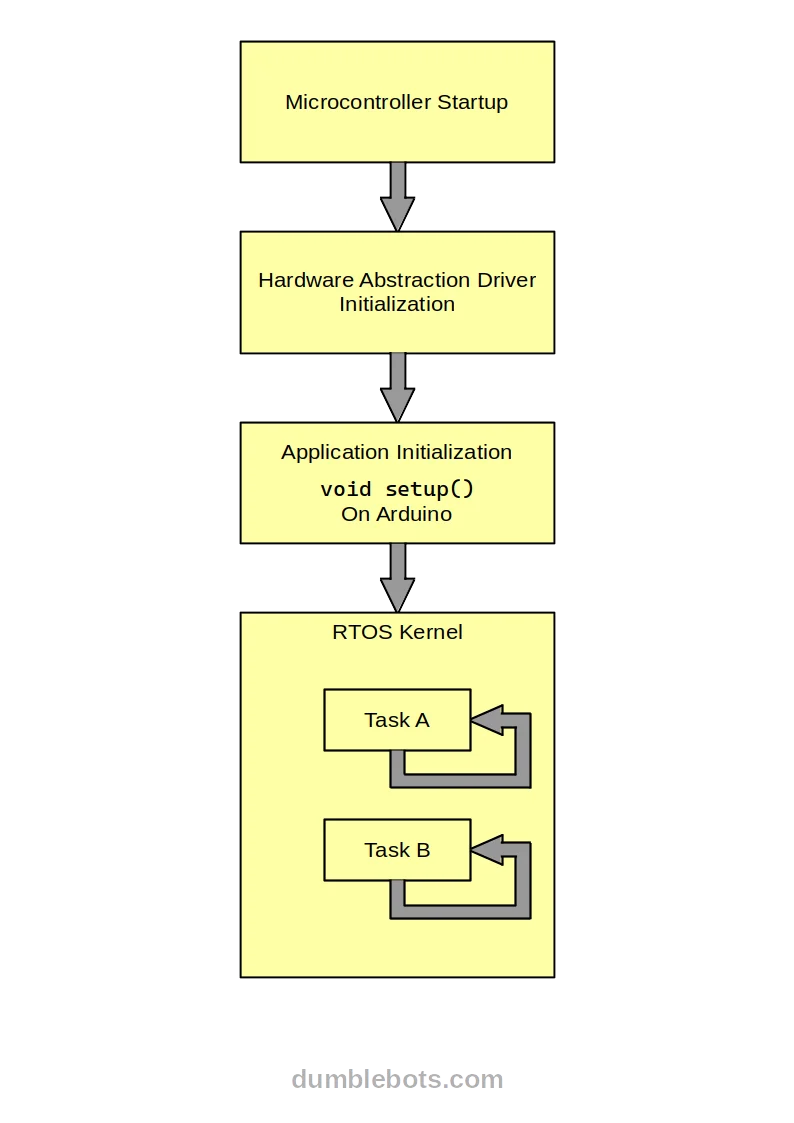
In the first case, task A must be completed before task B starts. As mentioned earlier, this linear flow of the program works in certain cases, but is not suitable for all applications (such as those requiring internet connectivity while other tasks are being performed). In the second diagram, tasks A and B (and any others) are being performed concurrently, as the RTOS shares execution time between them. Each task is given a small amount of time to run, after which it is paused and the next task takes its place. This is repeated for all tasks in a cycle, giving the effect of them running concurrently.
Note that for an RTOS to be usable, microcontrollers often require certain specific features. They also require certain minimum memory and speed for their advantages to be visible. This is why they are not used on boards such as the Arduino UNO, Mega, Micro etc. that use 8-bit AVR Microcontrollers. Boards that use ARM Cortex Processors, however, such as the Nano and MKR Families, can use and benefit from an RTOS.
Comparing an RTOS (like Mbed OS) to a GPOS (like Linux)
At first glance, an RTOS may seem to be the same as a GPOS (General Purpose Operating System) such as Windows or GNU/Linux. They are, however, made to serve different purposes, and have some important differences.
As mentioned before, an RTOS is made to give time-bounded responses to events (such as automatic breaking systems in automobiles). In contrast, a GPOS is meant for use in personal computers for running general applications, and therefore tries to keep the running programs responsive, but does not provide any guarantee as to how long any specific task should take to complete.
This difference is achieved by how the two paradigms provide multitasking capabilities. An RTOS is compiled along with the application into a single program, i.e. it is not a separate program on the microcontroller that manages and runs different programs. The program may spawn multiple tasks/threads that are concurrent, but will share the same memory. The scheduling strategies employed are much stricter, so as to allow as many tasks as possible to meet their deadline.
A GPOS, on the other hand, is its own program, that manages multiple programs simultaneously, each in its own sand-boxed environment with its own threads and memory. The identity of the programs are at any given moment distinct from one another and the Operating System itself. Since programs need not meet hard deadlines and each have their own memory, scheduling is also more lenient.
Program crashes are also harder to recover from in an RTOS. A program crashing on a GPOS may not be ideal, but the GPOS can effectively and gracefully recover due to the program being in a sand-boxed environment and the Operating System is continuously monitoring it. The same is not true for an RTOS, where the program and RTOS share the same physical and logical resources.
The interplay between the bootloader and RTOS
Another point of confusion for many, is the interplay between a Bootloader and an RTOS. Both are pieces of software used in Arduino (and general microcontroller) development and it may not immediately be clear as to how they behave together.
A bootloader (short for Bootstrap Loader), in the context of Microcontrollers, is a program that allows other programs (written by you) to be downloaded into the microcontroller's memory without the need for external circuitry such as programmers and debuggers. This helps save development time and cost.
When boards such as the Arduino UNO, Mega are powered on, the bootloader is the first program to run, and it waits for an application program to be sent on the Serial UART Port. If one is available, it is read and written to the microcontroller's ROM. After this is done (or in the case when no program is available), the bootloader resets the microcontroller and gives control to the application program, which starts executing.
This is also the case in many ARM Microcontrollers, albeit with more features such as OTA (Over-The-Air) updates etc. Shown below is a diagram to illustrate the development process in systems with and without a bootloader.
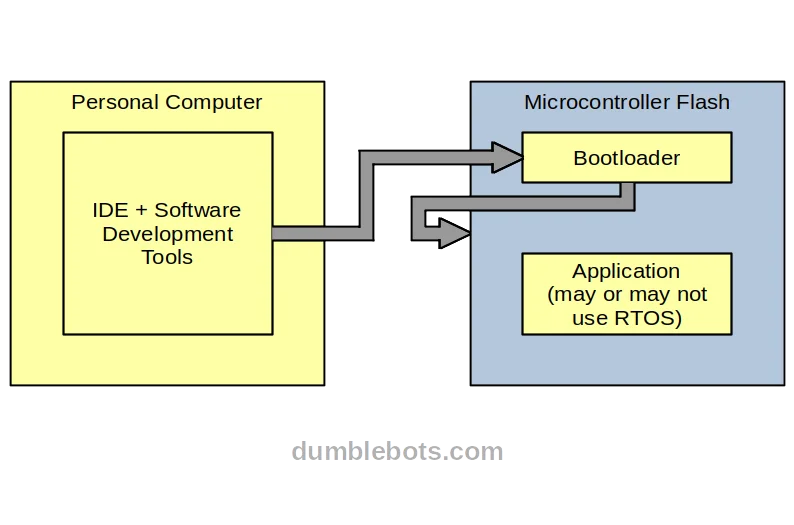

Whether an RTOS is used or not, the application program is finally compiled into a single file. This file is divided into sections, with each section having a start address in the ROM, a length and the data itself as a sequence of bytes.
The bootloader is agnostic to the application program being downloaded into the flash, i.e. whether it uses an RTOS or not. In fact, the bootloader does not even check whether the program being downloaded is valid or not, i.e. it may be a sequence of random bytes. It merely reads the data sent to it (in the above mentioned format) and writes this to the flash.
Other RTOSs
Mbed OS is not the only RTOS out there, and others do exist that are actively maintained and have there own characteristic features, pros and cons. While it beyond the scope of this blog to go over each individually, given below is a list of a few popular alternatives -
| RTOS Name | Website |
|---|---|
| FreeRTOS | https://www.freertos.org/ |
| ThreadX | https://azure.microsoft.com/en-us/products/rtos |
| Zephyr | https://zephyrproject.org |
MBed OS supported boards by Arduino
When this blog was first written, the only boards with Mbed OS support were the Arduino Nano 33 BLE and BLE sense. Since then, Arduino has added many boards These include the RP2040 boards and the new Nano, MKR, Portenta and Nicla families. For the purpose of this blog, we will be sticking to the Arduino Nano 33 BLE since it is the oldest and simplest to get started with.
Setting up the MBed core for the Nano family
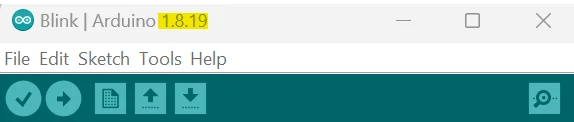
Now that we have clarified some basics about RTOSs, we can move onto setting up the Mbed OS Core for Nano Boards on the Arduino IDE (this includes support for the Nano 33 BLE and BLE Sense). Before proceeding, make sure that you have the latest version of the Arduino IDE installed (version 1.8.19 as of writing this). After the Mbed core has been set up, the mbed.h header file can be included in the code and the features provided by the library used.
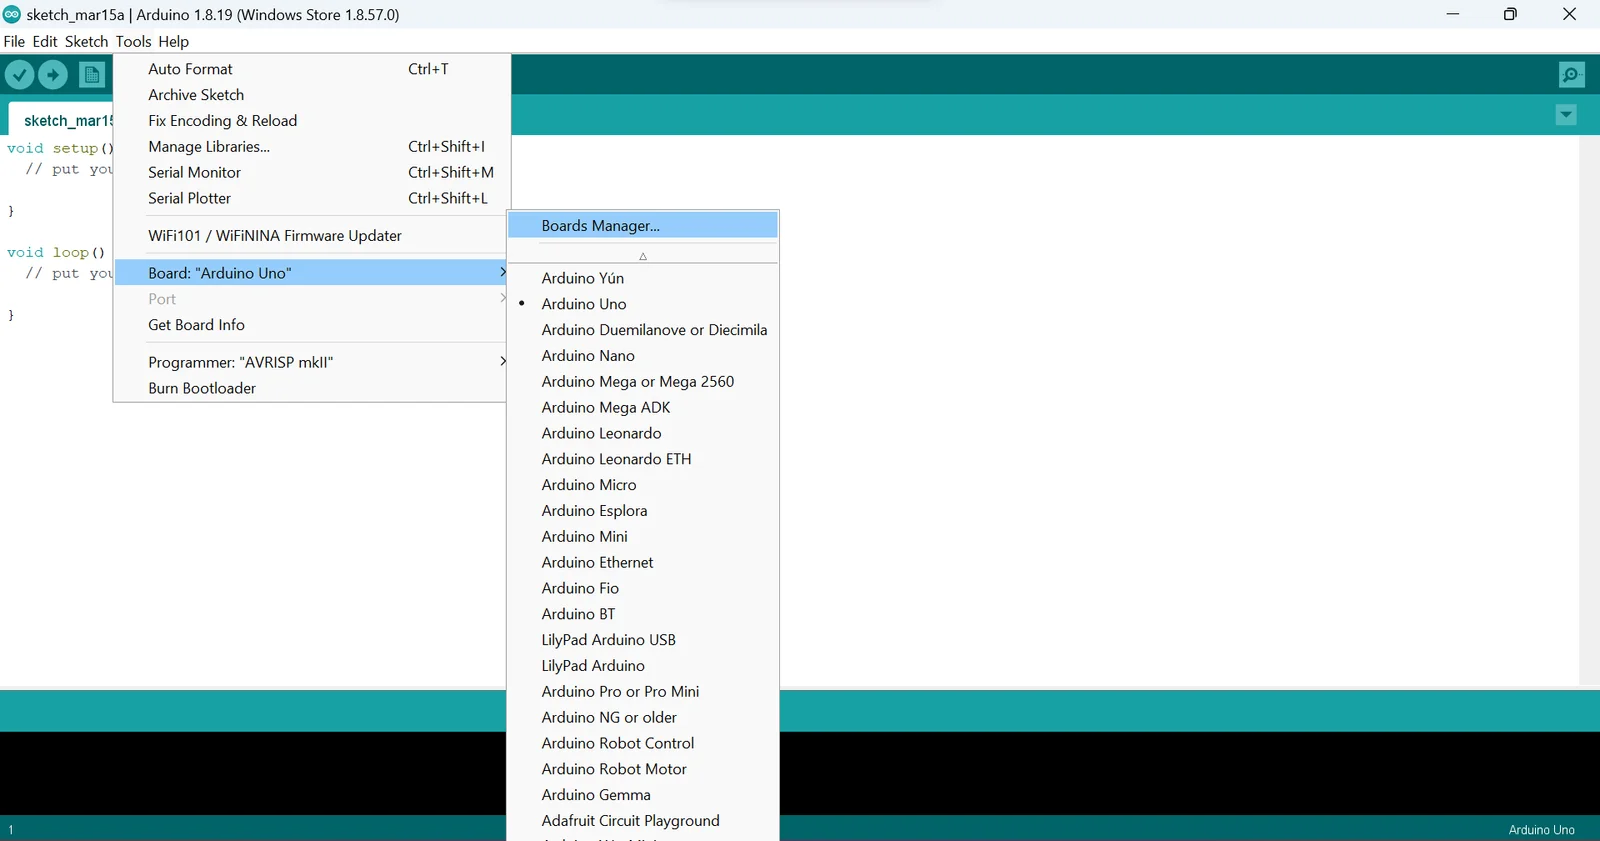
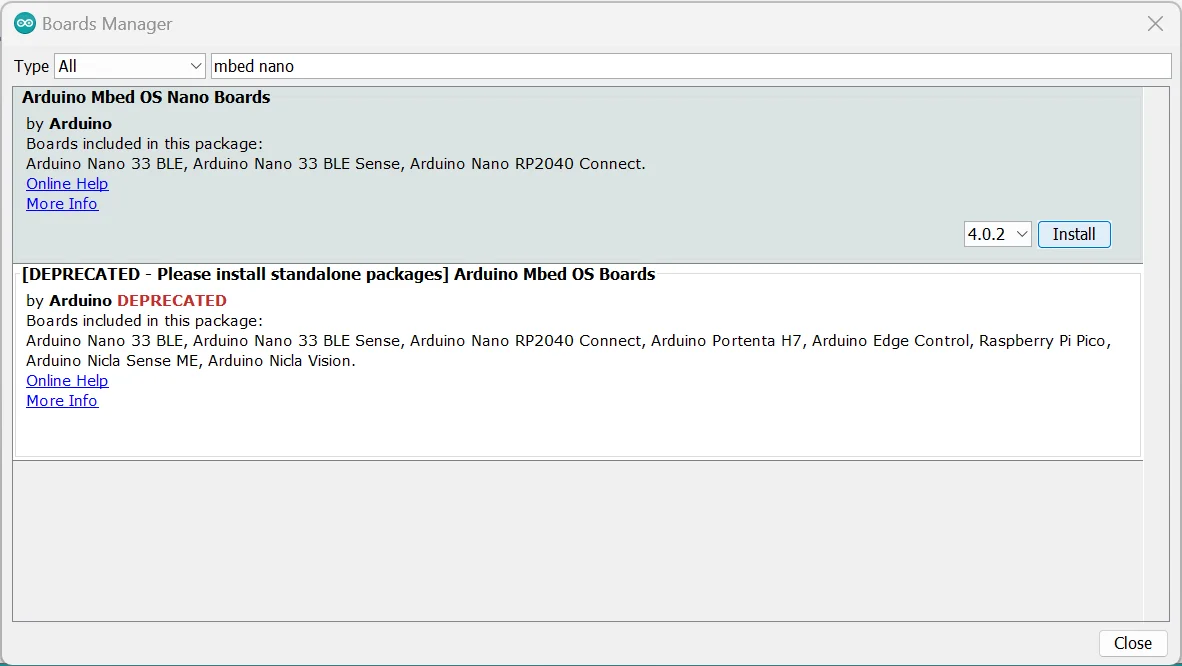
Open the "Tools" > "Board" > "Boards Manager" and enter "mbed nano" in the search bar. The first entry should be labelled "Arduino Mbed OS Nano Boards". Click on it and install its latest version (version 4.0.2 as of writing this). This step may take some time, be patient. On Windows, this may require you to have administrator privileges. If it is already installed, make sure that you are at the latest version (this can prevent a lot of bugs from happening).


After setting up the Mbed Core and selecting the appropriate board, you should now be able to write programs that can take advantage of the features provided by Mbed OS. When writing programs using Mbed OS in the Arduino IDE, the structure of the program remains the same, i.e. the setup and loop functions still exist.
The Mbed Library is automatically linked with the program and all the required initialization is done automatically behind the scenes. This means that the application is now capable of using the Mbed OS features like creating tasks, if it needs to or may stick to the familiar Arduino functions only.
Simply include the mbed.h header file at the start of the program and compile it. As mentioned before, the built program includes the Mbed Library, albeit invisible at the moment.
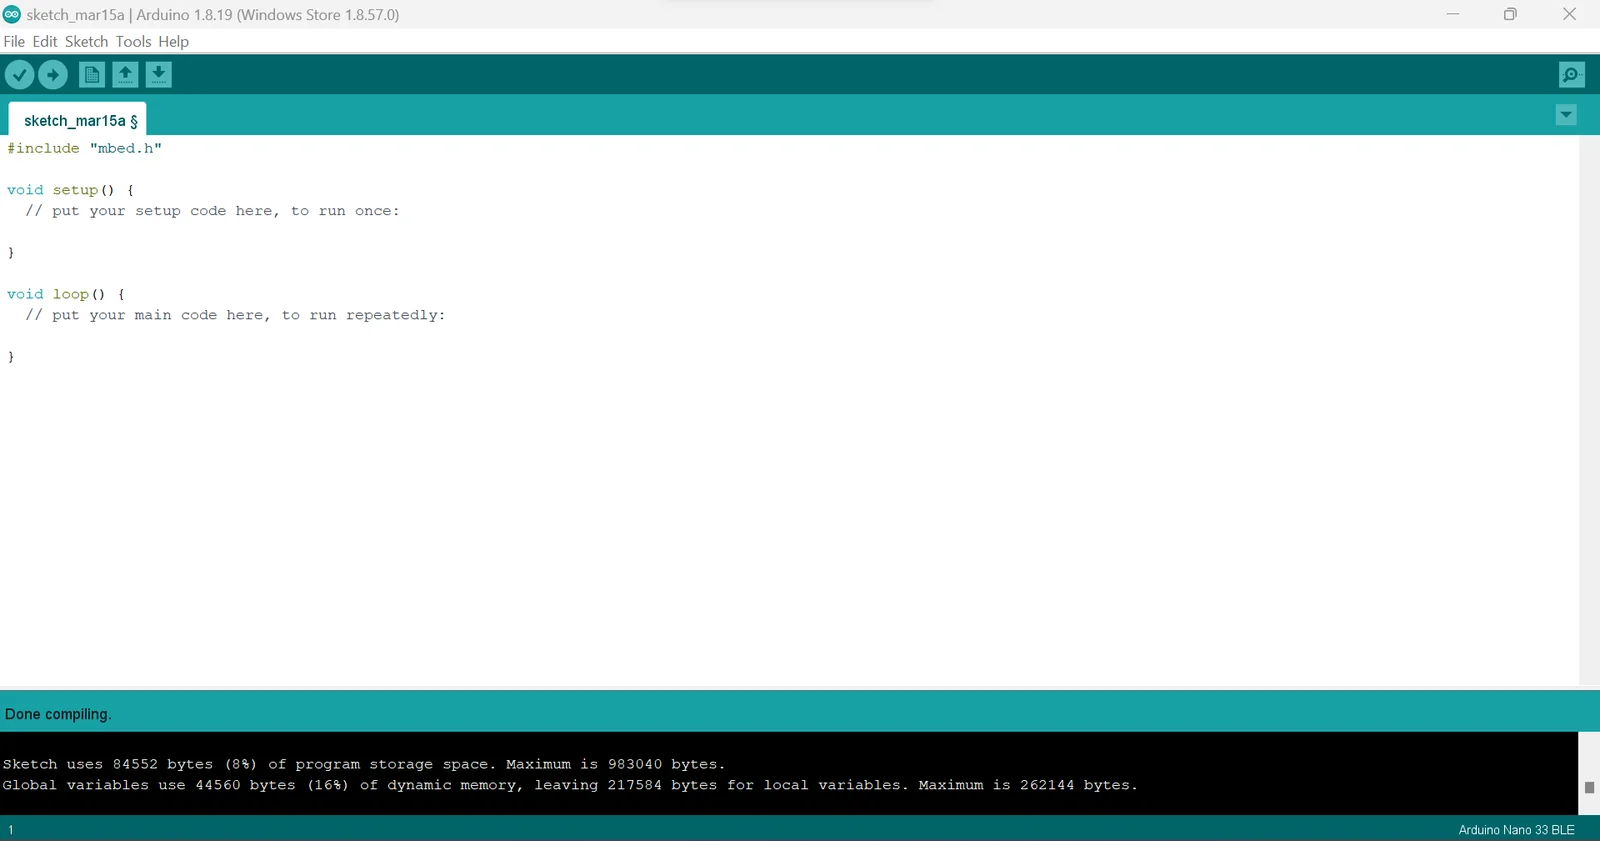
A successful compilation indicates that the setup is complete and you can now use Mbed OS with the Arduino. In the next part of this blog, we will go over writing a basic application using Mbed OS functions and then move onto a multi-threading example.